


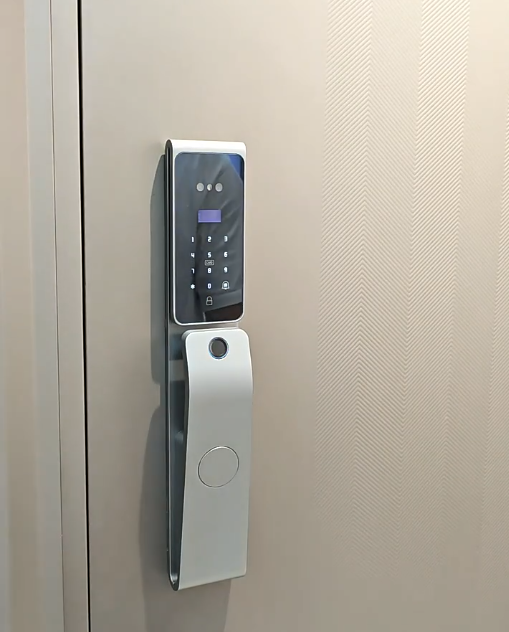
Smart door lock installation is simpler than many people expect, but getting it right matters: a clean, well-aligned fit protects the motor, extends battery life, and ensures years of reliable operation. This complete guide explains what smart door lock installation involves, whether to do it yourself or hire a professional, and the steps to get it right the first time. Whatever lock you choose, a good installation is what turns a quality product into a lock that just works. Browse models on our smart door lock range.
Spend a little care on installation and your lock rewards you every day; rush it and you invite avoidable problems.

Before you start: check compatibility
The first step of any smart door lock installation is confirming the lock fits your door. Measure the door’s thickness — a 40–120 mm support range covers most — and note the material (wooden, metal or composite) and the existing mortise or bore. Matching the lock to your door avoids the single most common installation problem: a lock that doesn’t quite fit. If in doubt, our door-specific guides for wooden and metal doors help.
DIY vs professional installation
Whether to install yourself or hire a professional depends on your door and confidence. The table below compares the two so you can decide.
| Factor | DIY installation | Professional installation |
|---|---|---|
| Cost | Lower — your time only | A fitting fee |
| Best for | Standard doors, confident DIYers | Metal/glass doors, tricky fits, peace of mind |
| Alignment | Depends on your care | Precise, protecting the motor |
| Time | 1–2 hours for a first-timer | Usually under an hour |
| Risk | Misalignment if rushed | Minimal — done to spec |
Tools you’ll typically need
For a standard DIY smart door lock installation, you’ll usually need a screwdriver (often just the one supplied), a drill for any new holes, a tape measure, a pencil, and possibly a chisel if the mortise needs adjusting. Most locks come with a template and fixings. Having the right tools ready before you start makes the job smoother and reduces the chance of a rushed, imprecise fit that strains the motor later.
The installation steps
A typical installation follows a clear sequence: remove the old lock; offer up the new lock using the supplied template to mark positions; fit or adjust the mortise and bolt housing; mount the exterior and interior panels and connect them; install the strike plate in the frame, aligned with the bolts; insert the battery; and test. Following the manufacturer’s instructions closely at each step is the key to a clean result that works first time.
Getting alignment right
Alignment is the single most important part of installation. The bolts must seat squarely into the strike plate without binding, so the motor isn’t straining on every cycle. A misaligned lock wears the motor and drains the battery faster. Take time to position the strike plate precisely, test the bolt travel by hand, and adjust until the action is smooth. This one detail does more for long-term reliability than any other part of the installation.
Setting up after installation
Once the lock is physically fitted, set it up: enrol each family member’s fingerprint and face carefully in good light, set a strong master PIN, register a backup card, and locate the mechanical key safely. On a connected lock, link it to your Wi-Fi and the app (Covlor locks use Tuya and Smart Life), then enable the alerts you want. Test every access method before relying on it, so you know the lock works for everyone from day one.
Caring for the lock after installation
A good installation deserves a little ongoing care to stay that way. Every few months, check that the door still sits squarely and the bolts seat cleanly, since doors can drop slightly on their hinges or swell in humidity over time, making the motor work harder. Keep the fingerprint sensor and keypad clean for fast, accurate reads. Recharge or replace the battery when the lock first warns you, and keep the app and firmware updated for the latest features and security. These few minutes of occasional attention preserve the clean alignment you achieved at installation and keep the lock operating smoothly for years, protecting the investment you made in fitting it properly.
Common installation mistakes
A few mistakes catch out first-timers: skipping the compatibility check and buying a lock that doesn’t fit; forcing the lock into a poorly prepared mortise; misaligning the strike plate so the bolt binds; and over-tightening fixings. Each can cause poor operation or premature wear. Avoid them by measuring carefully, preparing the door properly, and taking time over alignment. If any step feels beyond you, a professional fitting is money well spent.
Preparing your door before installation
A little preparation makes installation far smoother. Clear the area around the door and remove the old lock fully, checking the condition of the existing holes. If you’re moving from a traditional lock, the bore may need slight adjustment to match the new lock’s template — measure twice before cutting or drilling. Check that the door sits squarely in its frame and isn’t dropped on its hinges, since a misaligned door makes bolt alignment harder. Have the manufacturer’s template, fixings and instructions to hand, and read through the full sequence once before starting. This preparation prevents the mid-installation surprises that lead to a rushed, imprecise fit, and sets you up for clean alignment and smooth operation.
Troubleshooting after installation
If something isn’t right after fitting, most issues trace back to alignment. A bolt that drags or doesn’t fully extend usually means the strike plate needs repositioning so the bolt travels freely. A motor that sounds strained points to the same cause. If biometrics are slow to read, re-enrol in good light and clean the sensor. If a connected lock won’t pair, confirm it’s within Wi-Fi range and the app is updated. Most post-installation problems are quick to fix and come down to either alignment or setup rather than a faulty lock — which is why taking care over alignment during installation prevents the majority of them in the first place.
When to call a professional
Call a professional if your door is metal, glass or unusually built, if the existing hole doesn’t match the new lock, or if you simply want the assurance of a precise fit. For a main door especially, professional installation protects your investment by ensuring the motor and bolt work in harmony. Covlor’s lineup — the CR-L108, CR-L99, CR-L88 and CR-L51 — offers face and palm recognition, fingerprint, PIN, card and app control, multi-bolt bodies driven by an all-metal gear motor, wide 40–120 mm door-thickness support and emergency USB-C power, and a good installer will fit it cleanly to your specific door. Compare models in our best smart door lock guide.
The bottom line
Smart door lock installation is straightforward when done with care: check compatibility, prepare the door, follow the steps, and above all get the alignment right so the bolts seat cleanly and the motor isn’t strained. Confident DIYers can handle a standard door; metal, glass or tricky fits are best left to a professional. Add careful setup of users, codes and the app, and your lock will deliver effortless, reliable, key-free entry for years — which is exactly what a good installation makes possible.
Frequently asked questions
Is smart door lock installation difficult?
Not usually. On a standard door, a confident DIYer can fit most smart locks in one to two hours using the supplied template and fixings. The key is checking compatibility first and getting the bolt-to-strike alignment right so the motor isn’t strained. Tricky doors are best left to a professional.
Should I install a smart lock myself or hire a professional?
DIY suits standard doors and confident users and saves the fitting fee. Choose a professional for metal, glass or unusually built doors, if the existing hole doesn’t match, or for the assurance of a precise fit — especially on a main door, where alignment protects the motor.
Will a smart lock fit my existing door?
Most smart locks support a 40–120 mm thickness range covering wooden, metal and composite doors, and often reuse the existing mortise. Measure your door’s thickness and note its material before buying, and check the lock’s compatibility to avoid the most common installation problem.
What’s the most important part of installation?
Alignment. The bolts must seat squarely into the strike plate without binding, so the motor isn’t straining on every cycle. Good alignment protects the motor, extends battery life and ensures smooth operation — it matters more for long-term reliability than any other step.
Explore the range: see current models, features and prices on the Covlor smart door locks shop, or message us on WhatsApp +91 8860055551 for help choosing the right lock for your door.

